
Learning how to use a handheld laser welding machine is the first step to eliminating post-weld grinding and speeding up your shop’s daily production. Finding skilled TIG (Tungsten Inert Gas) welders is harder and more expensive than ever. Meanwhile, your metal fabrication shop likely loses hours every week to slow setup times, heat distortion, and endless polishing on cosmetic parts.
A 1000W to 1500W handheld fiber laser welder is the ultimate “first laser” for small fabrication shops. It allows semi-skilled staff to produce clean, structurally sound welds up to four times faster than TIG welding. This guide covers exactly how to use this equipment on the shop floor, including step-by-step setups, dialing in parameters to avoid burn-through, real-world shop applications, and how to keep your crew safe.
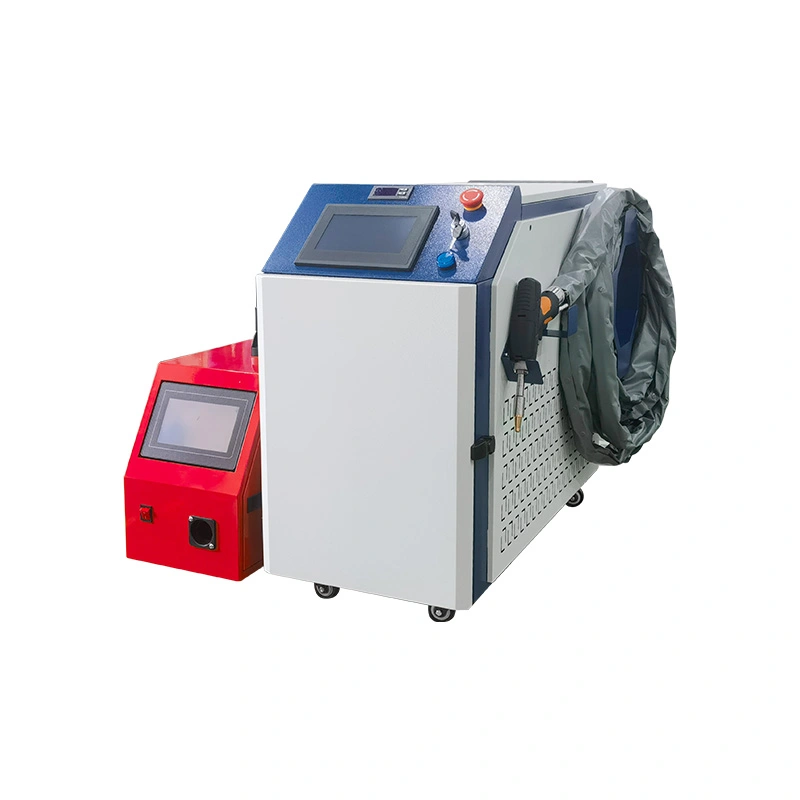
Why Fabrication Shops Are Switching from TIG to Handheld Laser Welding
Zero Distortion and No Rework: Laser welding creates a very narrow heat-affected zone (HAZ). Because the heat is hyper-focused, it does not warp or pull the metal. You can completely eliminate the post-weld straightening phase and drastically reduce abrasive polishing time.
Overcoming the Skills Gap: TIG welding requires exceptional hand-eye coordination and takes years to master. The intuitive push-and-pull mechanics of a handheld laser can be learned by a beginner in just one or two days of training.
Speed and Efficiency: Handheld laser welding operates at incredibly high speeds. For example, it easily achieves travel speeds of 25 to 40 mm/s on 1.0 mm stainless steel, making it up to four times faster than traditional manual welding.
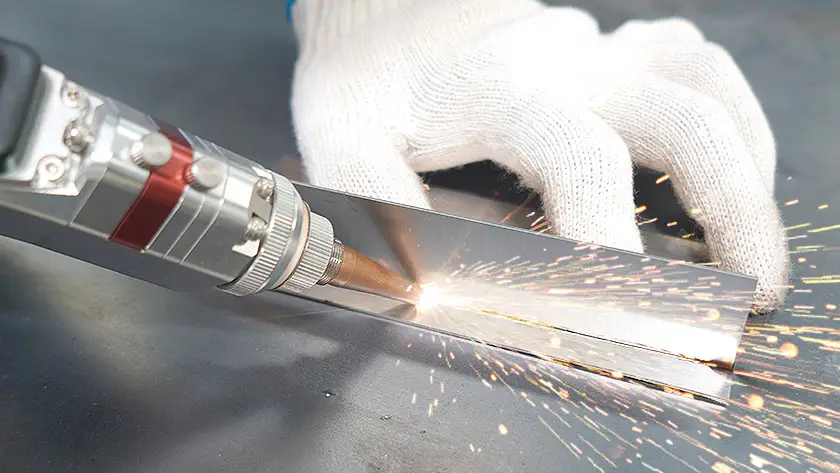
Step-by-Step: Setting Up Your Handheld Laser Welder
Step 1: Joint Prep and Fit-Up
Laser welding demands exceptionally clean metal. You must thoroughly wipe down the surface with acetone or alcohol to remove oil, grease, moisture, and rust. If left on the metal, these contaminants will vaporize instantly under the laser beam and cause severe porosity (bubbles or holes) in your weld seam. Use clamps to ensure a tight, flush fit-up.
Step 2: Choosing Your Shielding Gas
Shielding gas protects the molten metal from atmospheric oxygen and prevents black oxidation marks.
- Argon (Ar): The standard shop choice. It provides a stable arc and bright, clean finishes on stainless steel and mild steel at a flow rate of 12 to 25 liters per minute (L/min).
- Nitrogen (N2): A highly cost-effective alternative for thin sheets. It flows at 15 to 25 L/min and actively improves corrosion resistance when welding austenitic stainless steel.
Step 3: Dialing in Power and Wobble to Prevent Burn-Through
Setting the correct laser power and wobble (beam oscillation) is critical for success. A 1000W to 1500W machine is the optimal power range for welding 1.0 mm to 3.0 mm stainless and carbon steel.
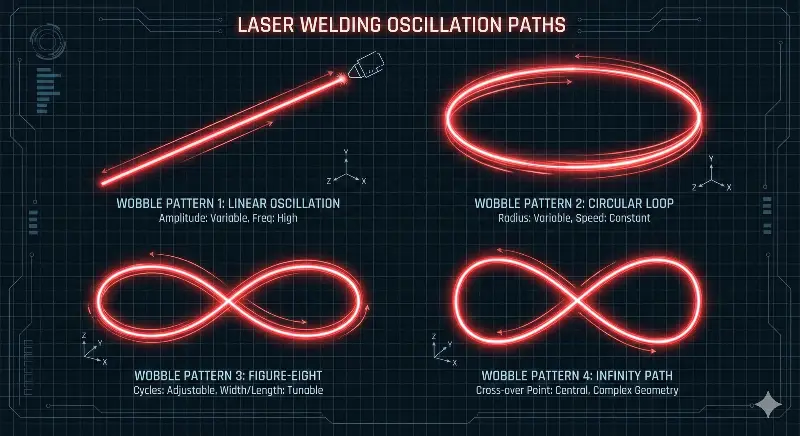
The “wobble” setting moves the laser beam rapidly from side to side to artificially widen the weld pool. To prevent burn-through on thin sheets, use a wider wobble width of 2.5 mm to 4.5 mm to spread the thermal heat over a larger area. For deep structural penetration on thicker plates, tighten the wobble to 1.5 mm to 2.5 mm to concentrate the laser energy into the root of the joint.
Standard Starting Parameters:
| Material | Thickness | Laser Power | Travel Speed | Wobble Width |
| Stainless Steel | 1.0 mm | 900–1200 W | 25–40 mm/s | 2.5–3.0 mm |
| Stainless Steel | 1.5 mm | 1200–1500 W | 20–30 mm/s | 2.5–3.0 mm |
| Carbon Steel | 2.0 mm | 1400–1800 W | 15–25 mm/s | 2.0–2.5 mm |
| Aluminum | 1.5 mm | 1500–2000 W | 15–25 mm/s | 3.0–3.5 mm |
(Note: Data reflects baseline starting parameters. Always test on scrap metal first.)
Shop Floor Scenarios: Welding Real Parts
Scenario A: Cosmetic Stainless Steel Handrails & Cabinets
- The Goal: A bright, perfect seam with zero spatter that requires no grinding.
- The Technique: If aesthetic appearance is more important than ultimate structural strength, you can intentionally under-power your machine. Input parameters for metal that is 1 mm thinner than your actual workpiece. For example, when welding 2 mm stainless steel, select the presets for 1 mm thickness. This produces a brighter, shallower weld. Use the “push” technique (moving the gun toward the direction of travel) to create a flatter, wider bead and limit the risk of burn-through.
Scenario B: Structural Metal Frames and Brackets
- The Goal: Maximum penetration and structural strength without warping the assembly.
- The Technique: Position the laser focus exactly on the material surface (zero defocus) or slightly below it to create a deep, narrow “keyhole” weld. A handheld laser excels at welding metal brackets because the fast travel speed prevents the frame from warping, allowing you to skip the straightening press. Use the “pull” technique (dragging the gun away from the direction of travel) to achieve a narrower, higher, and deeper penetrating bead.
Keeping Your Shop Safe: Laser Welding Safety Demystified
Handheld lasers are incredibly safe when shop owners enforce the rules. However, because these are Class 4 high-power lasers, standard arc welding helmets are completely inadequate for eye protection.
- PPE Requirements: Operators must wear ANSI Z87.1 high-velocity impact-tested safety glasses. These glasses must have an Optical Density of 7 or higher (OD7+) specifically rated to block the 1064 nm wavelength. This eyewear must be worn directly underneath a certified laser welding hood to protect the face and neck from scattered light and thermal radiation.
- Securing the Area: You do not need an expensive robotic cell, but you must protect bystanders. Surround the welding area with heavy-duty, multi-layered laser safety curtains. For Class 4 fiber lasers, these curtains should be rated to withstand up to 2150 W/cm² for 100 seconds to safely stop stray beam reflections.
- Fume Extraction: Laser welding rapidly vaporizes metals, creating hazardous Laser-Generated Air Contaminants (LGACs). You must use a local exhaust ventilation (LEV) system equipped with HEPA (High-Efficiency Particulate Air) filters. HEPA filters capture 99.999% of harmful metallic particulates that are 0.3 microns in diameter, keeping the operator’s breathing zone safe and OSHA compliant.
Conclusion: Fast-Track Your Fabrication
Upgrading to a 1000W or 1500W handheld fiber laser is a massive competitive advantage for small fabrication shops. It delivers much faster turnaround times, eliminates the need for post-weld grinding, and allows you to utilize semi-skilled labor effectively. By following proper setup procedures, dialing in your wobble settings, and strictly adhering to ANSI safety standards, your shop can increase throughput while maintaining exceptional cosmetic quality.
Stop guessing on your settings. Download our Parameter Cheat-Sheet for standard power, speed, and wobble settings on common stainless and carbon steel thicknesses.
Seeing is believing. Book a demo weld with us and bring your actual shop parts to see how fast we can fuse them.
FAQs
First, check three safety features:
Ensure the red Emergency Stop button is released (twist it to pop it out).
Make sure the Key Switch is in the “ON” position.
The Safety Interlock (the copper nozzle) must be in firm electrical contact with your metal workpiece, or the laser will not fire.
Use a piece of scrap metal. Point the gun at it and adjust the nozzle’s length. The correct focus is the exact distance that produces the maximum, brightest sparks and the loudest “pop”. This ensures the laser’s energy is concentrated perfectly on the surface, as shown in the focus diagram.
The red light is your guide light. Before welding, activate it and look through the nozzle. The red dot must be perfectly centered in the opening. As the diagram illustrates, if the light is off-center or blocked, the laser will hit the nozzle instead of your workpiece, which can damage the machine. You must adjust it in the settings menu before use.
No. A standard welding helmet does not protect your eyes from the invisible infrared laser light. You must use a pair of Laser Safety Goggles that are specifically rated for the wavelength of your laser (e.g., ~1080nm) and have a high Optical Density (OD) of 6+