
The best acrylic sheets for laser cutting are cast acrylic for engraving and extruded acrylic for clean cutting edges. Cast acrylic creates a frosty white engraving mark, while extruded acrylic often produces a clearer, flame-polished edge when cut. For most acrylic sheet cutting projects, a CO2 laser is the best choice because acrylic absorbs the 10,600 nm infrared wavelength very well.
If your project needs sharp engraving, choose cast acrylic. If your project needs smooth clear edges for signs, displays, panels, or decorative parts, extruded acrylic is often the better choice. Always test your CO2 laser settings on scrap acrylic before cutting the final sheet, because thickness, color, laser power, focus, and air assist all affect the result.
This guide explains how to choose acrylic sheets for laser cutting, how cast and extruded acrylic behave under a CO2 laser, what starting settings to use, and how to avoid common problems such as melting, flames, rough edges, and incomplete cuts.
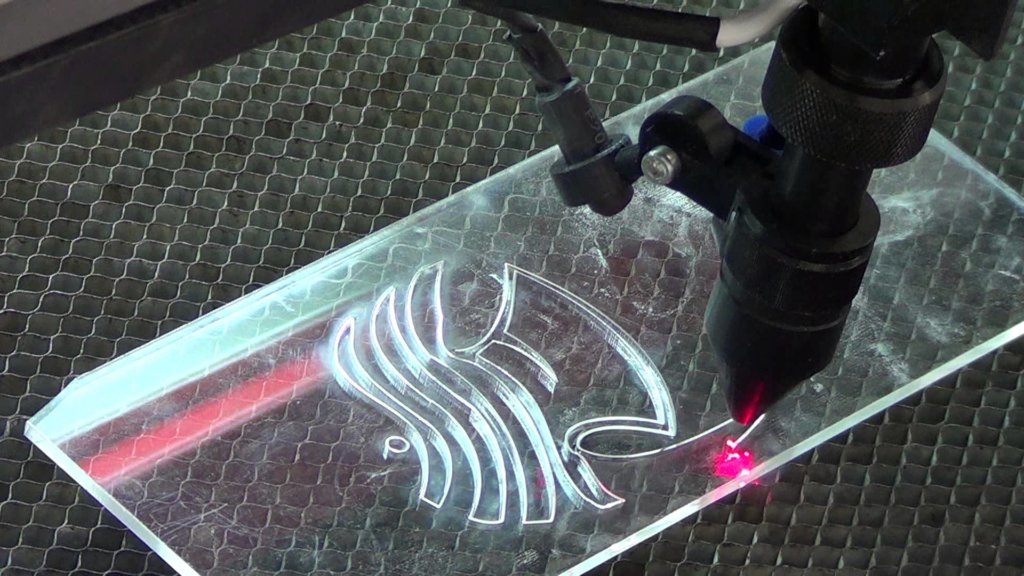
What Are the Best Acrylic Sheets for Laser Cutting?
The best acrylic sheet for laser cutting depends on your final result. Choose cast acrylic if you need detailed engraving with a frosty white mark. Choose extruded acrylic if you mainly need clean cutting with a clearer, flame-polished edge.
Both cast and extruded acrylic can be cut with a CO2 laser, but they react differently because they are made in different ways. Cast acrylic is poured into molds, while extruded acrylic is pushed through a die. This difference affects engraving quality, edge finish, thickness tolerance, and price.
Cast vs Extruded Acrylic for Laser Cutting
| Feature | Cast Acrylic | Extruded Acrylic |
|---|---|---|
| Best for | Engraving and projects that need strong visual contrast | Cutting jobs that need smooth, clear edges |
| Laser engraving result | Creates a sharp, frosty white mark | Melts more easily and gives lower engraving contrast |
| Laser cut edge | Often slightly matte or frosted | Often clearer and more flame-polished |
| Thickness tolerance | Can vary more from sheet to sheet | Usually more consistent |
| Cost | Usually higher | Usually lower |
| Recommended use | Awards, signs, nameplates, decorative engraving, premium display parts | Clear panels, display stands, signage, covers, general cutting projects |
When Should You Choose Cast Acrylic?
Choose cast acrylic when engraving quality matters. It produces a clean frosted mark that stands out clearly on the surface. This makes it a good choice for awards, plaques, nameplates, decorative signs, and detailed artwork.
Cast acrylic is also a safer choice when your project needs both cutting and engraving on the same sheet. The cut edge may look slightly matte, but the engraving result is usually much better than extruded acrylic.
When Should You Choose Extruded Acrylic?
Choose extruded acrylic when your main goal is clean cutting. It usually creates a smoother and clearer edge directly from the CO2 laser, which is useful for display stands, clear panels, retail signs, protective covers, and general acrylic parts.
Extruded acrylic is often more affordable and has more consistent thickness, but it is not ideal for detailed engraving. If you engrave it, the result may look melted or low-contrast instead of crisp and white.
Can a CO2 Laser Cut Acrylic and Plexiglass?
Yes. A CO2 laser can cut acrylic sheets and plexiglass very well. Acrylic, also known as PMMA, absorbs the 10,600 nm infrared wavelength from a CO2 laser efficiently. This allows the laser to vaporize the material and create smooth, accurate cuts.
Plexiglass is a common brand name often used to describe acrylic sheets. In most laser cutting projects, users may search for acrylic, PMMA, plexiglass, or lucite to describe similar clear plastic materials. A CO2 laser is usually the best choice for these materials because it works well on both clear and colored acrylic sheets.
If you are comparing machine types, Riselaser provides different laser cutting machines for different materials and production needs. For acrylic, wood, leather, paper, and many non-metal materials, CO2 laser technology is usually more suitable than fiber laser cutting.
Why CO2 Lasers Work Well for Acrylic Cutting
CO2 lasers are widely used for acrylic cutting because their wavelength is strongly absorbed by acrylic. This makes the cutting process more stable than diode or fiber laser cutting. With the right power, speed, focus, air assist, and exhaust system, a CO2 laser can produce clean edges, detailed shapes, and repeatable results.
This is why CO2 laser acrylic cutting is common for signs, display stands, light panels, awards, protective covers, retail fixtures, and custom decorative parts. You can also review Riselaser’s CO2 laser marking and engraving machines if your main application is marking or engraving acrylic and other non-metal materials.
Can a CO2 Laser Cut Clear Acrylic?
Yes. A CO2 laser can cut clear acrylic sheets effectively. Clear acrylic absorbs the CO2 laser wavelength, so the beam does not simply pass through the sheet. This makes CO2 lasers much more reliable than diode lasers for clear acrylic cutting.
For the best result, keep the sheet flat, focus the laser correctly, use proper ventilation, and test your settings on scrap acrylic before cutting the final piece.
CO2 Laser vs Diode Laser vs Fiber Laser for Acrylic Cutting
| Laser Type | Clear Acrylic | Colored Acrylic | Best Use |
|---|---|---|---|
| CO2 Laser | Excellent | Excellent | Cutting and engraving acrylic sheets, plexiglass, signs, panels, and displays |
| Diode Laser | Poor | Limited; works better on dark opaque acrylic | Small hobby projects with selected dark materials |
| Fiber Laser | Not recommended | Not recommended | Mainly metal marking and metal processing, not acrylic cutting |
A diode laser may cut some dark opaque acrylic, but it usually struggles with clear or light-colored acrylic sheets. A fiber laser is also not the right choice for acrylic cutting because its wavelength is designed mainly for metals. For acrylic sheets, plexiglass, and clear plastic panels, a CO2 laser is the safer and more reliable option.
For a broader comparison of laser types, you can read Riselaser’s guide on CO2 vs fiber vs UV laser machines.
What CO2 Laser Power Do You Need for Acrylic?
The right CO2 laser power depends on acrylic thickness, production speed, and edge quality requirements. A 40W–60W CO2 laser is suitable for many hobby and small business projects. It can usually cut acrylic sheets up to about 6 mm, depending on the machine condition and settings.
For thicker acrylic sheets, faster cutting, or more regular production, an 80W or higher CO2 laser is a better choice. For 12 mm acrylic or thicker materials, a 100W+ CO2 laser may be needed, and multiple passes or focus adjustment may be required.
Important: Laser power alone does not guarantee a clean acrylic cut. Focus, speed, air assist, lens condition, material flatness, and exhaust performance all affect the final result.
CO2 Laser Settings for Acrylic Sheets by Thickness
CO2 laser settings for acrylic depend on sheet thickness, laser power, lens condition, focus, air assist, and the type of acrylic you are cutting. The table below gives safe starting points for common acrylic sheet thicknesses.
Always test on scrap acrylic first. These settings are not fixed values. Use them as a starting range, then adjust speed, power, and focus until you get a clean cut with minimal melting, flame, or edge marks.
| Acrylic Thickness | Suggested CO2 Laser Power | Starting Speed | Starting Power | Best For |
|---|---|---|---|---|
| 1.5 mm / 1/16 inch | 40W–60W | 25–40 mm/s | 45%–60% | Thin tags, small signs, craft parts, light decorative pieces |
| 3 mm / 1/8 inch | 40W–60W | 15–25 mm/s | 55%–75% | Acrylic signs, display parts, nameplates, panels |
| 6 mm / 1/4 inch | 40W–80W | 5–20 mm/s | 50%–85% | Thicker signs, covers, fixtures, stronger acrylic parts |
| 12 mm / 1/2 inch | 100W+ | 3–8 mm/s | 70%–85% | Thick acrylic panels, heavy-duty displays, industrial parts |
How to Adjust CO2 Laser Acrylic Cutting Settings
If the acrylic melts, drips, or leaves a wide rough edge, the laser may be too hot for the material. Try increasing the speed, lowering the power, improving air assist, or checking the focus.
If the laser does not cut through the acrylic sheet, the energy is too low or the focus is not correct. Try reducing the speed, increasing the power slightly, checking the focal distance, and making sure the acrylic sheet is flat on the laser bed.
For 6 mm acrylic and thicker sheets, focus becomes more important. A common method is to focus near the middle of the material thickness instead of only on the top surface. This helps reduce angled edges and improves cut consistency on thicker acrylic.
Best Practice: Create a Small Acrylic Test Grid
Before cutting the final acrylic sheet, create a small test grid with different speed and power combinations. This helps you find the cleanest setting for your exact CO2 laser, acrylic brand, thickness, color, and edge quality requirement.
Once you find a good setting, record it for future jobs. This saves time and makes acrylic laser cutting more repeatable.
How to Cut Acrylic Sheets with a CO2 Laser
To cut acrylic sheets with a CO2 laser, prepare a vector file, keep the acrylic flat on the laser bed, set the correct focus, choose safe starting settings, turn on air assist and exhaust, then run a small test cut before the final job.
The basic process is simple, but small setup details can change the final edge quality. Poor focus, warped material, weak air assist, or incorrect power and speed can cause melting, flames, rough edges, or incomplete cuts.
1. Prepare a Vector Cutting File
Use a vector file such as SVG, DXF, AI, or PDF for laser cutting acrylic sheets. Vector lines tell the CO2 laser where to cut. Keep the design clean, remove duplicate lines, and make sure all cut paths are properly closed.
For small details, leave enough spacing between lines. Very thin shapes may melt, bend, or break during cutting, especially on thin acrylic sheets.
2. Keep the Protective Film On
In most cases, leave the protective paper or plastic film on both sides of the acrylic sheet during laser cutting. The film helps protect the surface from scratches, smoke marks, and light residue.
The CO2 laser will cut through the film and acrylic at the same time. Remove the film after cutting. If the film is damaged, unknown, or unsafe for laser use, test a small piece first or remove it before cutting.
3. Place the Acrylic Sheet Flat on the Laser Bed
Place the acrylic sheet flat on the honeycomb or knife-blade bed. If the sheet is warped, the laser focus will change across the surface. This can cause uneven cuts or areas that do not cut through.
Use light weights, hold-down pins, or magnets if needed, but make sure they stay away from the laser path. A flat sheet gives more consistent focus and cleaner edges.
4. Focus the CO2 Laser Correctly
Correct focus is one of the most important factors in acrylic laser cutting. The focal point is where the laser beam is most concentrated. If the focus is wrong, the cut edge may become wide, rough, angled, or incomplete.
For thin acrylic sheets around 3 mm or less, focusing on the top surface usually works well. For thicker acrylic sheets, such as 6 mm or more, many users focus near the middle of the material thickness. This can help reduce angled edges and improve cut consistency.
5. Use Air Assist and Proper Exhaust
Air assist helps clear smoke from the cutting path, reduce small flames, and improve edge quality. It should be strong enough to control smoke and flare-ups, but not so aggressive that it cools the cut too much or leaves marks on the acrylic.
A proper exhaust system is also necessary. Laser cutting acrylic produces strong fumes, so the machine should remove smoke quickly and vent it safely.
6. Run a Test Cut Before the Final Job
Before cutting the final acrylic sheet, test your settings on a scrap piece of the same material. Use the same thickness, color, and acrylic type whenever possible.
Check whether the laser cuts through cleanly, whether the edge is smooth, and whether there are signs of melting, flames, or rough marks. Adjust speed, power, focus, and air assist before running the final design.
How to Get Clean Edges When Laser Cutting Acrylic
Clean acrylic edges depend on the right balance of laser power, speed, focus, air assist, and material type. A good CO2 laser cut should pass through the acrylic smoothly without heavy melting, wide kerf, brown marks, or rough edge lines.
Extruded acrylic often creates a clearer, flame-polished edge directly from the laser. Cast acrylic usually cuts well too, but the edge may look slightly matte or frosted. This is normal and does not always mean the settings are wrong.
Use the Right Power and Speed Balance
If the laser moves too slowly or uses too much power, the acrylic can overheat, melt, drip, or leave a wide glossy edge. If the laser moves too fast or uses too little power, it may not cut through the sheet.
Start with a safe setting range, then adjust in small steps. For cleaner acrylic edges, it is usually better to find the lowest power and fastest speed that still cuts through the sheet completely.
Check the Focus Before Cutting
Focus has a major effect on acrylic edge quality. If the laser is out of focus, the cut may become wide, rough, angled, or incomplete.
For thin acrylic sheets, focusing on the top surface usually works well. For thicker acrylic, such as 6 mm or more, focusing near the middle of the sheet can help create straighter edges and reduce the natural V-shape of the cut.
Use Proper Air Assist
Air assist helps remove smoke from the cutting path and reduce small flames. It also helps prevent hot vapor from settling back onto the acrylic surface.
However, air assist should not be too weak or too aggressive. Weak air assist can cause smoke marks and flare-ups. Very strong air flow may cool the cutting zone too much or disturb the edge finish. Test different air levels if your machine allows adjustment.
Keep the Acrylic Flat
Acrylic sheets must sit flat on the laser bed. If the sheet is warped, the focal distance changes during cutting. This can cause one area to cut cleanly while another area fails to cut through.
Use light weights or hold-down pins when needed, but keep them away from the laser path. A flat sheet gives more consistent cuts and better edge quality.
Cutting Thick Acrylic Sheets
Thick acrylic sheets need slower speed, more stable focus, and sometimes multiple passes. For 6 mm acrylic, a 40W–80W CO2 laser can work depending on machine condition and settings. For 12 mm acrylic, a 100W+ CO2 laser is usually a better choice.
When cutting thick acrylic, do not rely only on higher power. Too much power can overheat the edge. Instead, adjust power, speed, focus, and air assist together. For very thick sheets, you may need to refocus between passes to keep the cut stable through the full material thickness.
Common Acrylic Laser Cutting Problems and Fixes
Most acrylic laser cutting problems come from incorrect power, speed, focus, air assist, material flatness, or poor exhaust. Use the table below to diagnose the issue before changing too many settings at once.
| Problem | Possible Cause | How to Fix It |
|---|---|---|
| Melting or dripping | Power too high, speed too slow, poor focus, or weak air assist | Increase speed, lower power, check focus, and improve air assist |
| Not cutting through | Power too low, speed too fast, wrong focus, or warped acrylic | Lower speed, increase power slightly, refocus the laser, and keep the sheet flat |
| Rough or jagged edges | Machine vibration, poor settings, dirty lens, or unstable material | Check machine stability, clean the lens, secure the sheet, and retest settings |
| Small flames | Weak air assist, slow speed, too much power, or poor exhaust | Improve air assist and exhaust, reduce power, and never leave the laser unattended |
| Smoke marks on the surface | Protective film removed, poor exhaust, or smoke staying near the cut | Keep the protective film on, improve exhaust, and clean the bed before cutting |
| Angled edge on thick acrylic | Focus set only on the top surface or beam energy not balanced through thickness | Focus closer to the middle of the sheet and test slower cutting speeds |
| Low engraving contrast | Using extruded acrylic instead of cast acrylic | Use cast acrylic for sharp frosty white engraving |
Tip: Change only one setting at a time when troubleshooting. If you adjust speed, power, focus, and air assist together, it becomes difficult to know which change actually improved the cut.
Safety Tips for Laser Cutting Acrylic Sheets
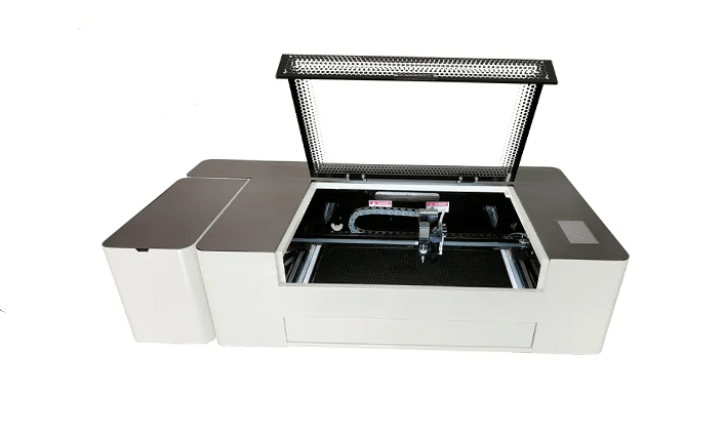
Laser cutting acrylic sheets is common, but it still requires strict safety control. Acrylic can produce strong fumes, small flames, and hot vapor during cutting. A CO2 laser beam can also cause serious eye injury if the machine is not properly enclosed.
Before cutting acrylic, make sure the laser machine, air assist, exhaust system, protective cover, and emergency stop are working correctly. Never leave the laser cutter unattended while it is cutting acrylic.
Use Proper Ventilation and Fume Extraction
Proper ventilation is necessary when cutting acrylic to manage fumes and maintain a safe working environment. A strong exhaust system should capture smoke and vapors at the cutting area and discharge them safely outdoors, where local regulations permit.
If outdoor venting is not possible, use a fume extraction system specifically designed for laser cutting plastics. The filtration system should be capable of handling both airborne particles and gas-phase vapors. Poor ventilation can expose operators to concentrated fumes, leave residue inside the machine, and reduce cutting quality.
For workplace safety reference, OSHA provides chemical data for methyl methacrylate, a compound associated with acrylic materials. You should also check the safety data sheet from your acrylic sheet supplier before laser cutting.
Control Flames with Air Assist
Acrylic can flare up if the laser power is too high, the speed is too slow, or air assist is weak. Air assist helps remove smoke, cool the cutting path slightly, and reduce small flames.
Small brief flames can happen during acrylic cutting, but they should not continue or spread. If flames persist, stop the machine, check air assist, reduce power, increase speed, and inspect the material setup before cutting again.
Wear the Right Laser Safety Protection
Use a properly enclosed CO2 laser machine whenever possible. The machine cover and viewing window should be rated for the CO2 laser wavelength, usually around 10,600 nm.
If you need laser safety glasses, make sure they are designed for the exact wavelength and power level of your CO2 laser. General safety glasses are not enough for laser protection.
You can also review general laser hazard guidance from OSHA when building internal safety procedures for laser equipment.
Do Not Cut Unknown Plastic Materials
Only cut acrylic sheets when you know the material is safe for laser cutting. Do not cut unknown plastic, PVC, vinyl, or materials with unclear additives. Some plastics can release dangerous or corrosive fumes when heated by a laser.
If you are unsure about a sheet, check the supplier information or safety data sheet before cutting. Material confirmation is a basic safety step, especially in workshops that process different plastics.
Post-Processing Laser Cut Acrylic Sheets
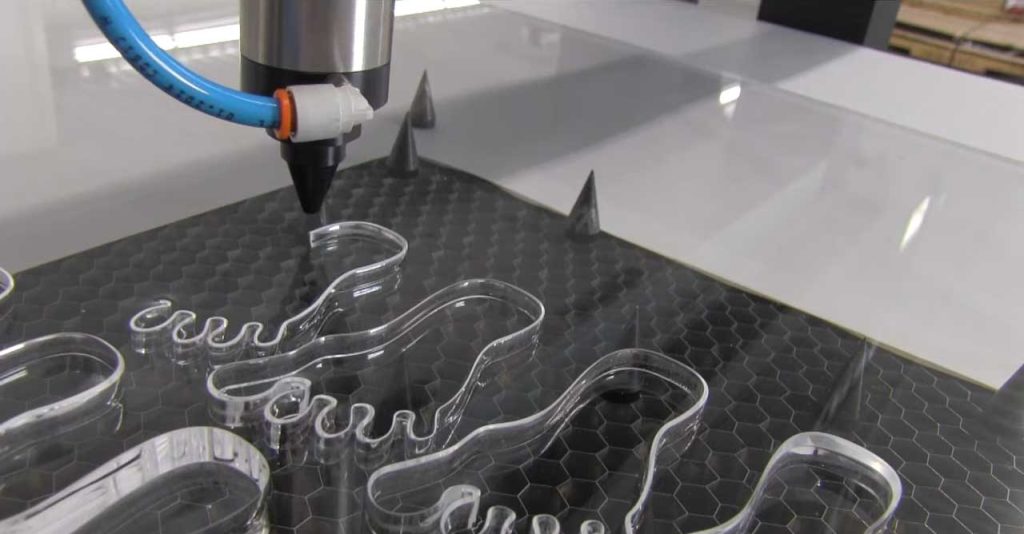
After laser cutting acrylic sheets, simple post-processing can improve the final appearance and make the part ready for use. Common steps include removing the protective film, cleaning light residue, polishing edges, and bonding acrylic pieces when needed.
Remove the Protective Film Carefully
If you kept the protective film on during cutting, remove it after the acrylic sheet has cooled. Peel it slowly to avoid scratching the surface or pulling on small detailed parts.
For delicate designs, support the acrylic with one hand while removing the film with the other. This helps prevent thin sections from bending or breaking.
Clean Smoke Marks and Residue
Use a soft microfiber cloth to remove light dust or residue from the acrylic surface. If needed, use a small amount of isopropyl alcohol on the cloth, not directly on the acrylic sheet.
Do not use harsh solvents or abrasive cleaners unless you know they are safe for acrylic. Some chemicals can cause crazing, cracks, or cloudy marks on the surface.
Polish Acrylic Edges When Needed
A CO2 laser can often create a smooth edge, especially on extruded acrylic. However, cast acrylic may have a more matte or frosted edge after cutting. If you need a clearer edge, you can use flame polishing, wet sanding, or buffing.
Flame polishing can create a glossy edge, but it requires practice. Too much heat can warp, bubble, or damage the acrylic. For better control, wet sanding with fine grit sandpaper followed by polishing compound is often safer.
Bond Laser Cut Acrylic Parts
To join laser cut acrylic pieces, use acrylic solvent cement instead of general glue. Solvent cement slightly softens the acrylic surface and creates a clean, strong bond when applied correctly.
Before bonding, make sure the edges are clean, dry, and properly aligned. Test on scrap acrylic first if appearance is important, because excess cement can leave marks or cloudy areas.
Applications of Laser Cut Acrylic Sheets
Laser cut acrylic sheets are used in signs, displays, decorative products, protective covers, lighting parts, prototypes, and custom business products. Acrylic is popular because it is clear, lightweight, easy to shape, and available in many colors and thicknesses.
With a CO2 laser cutter, users can produce detailed shapes, smooth edges, and repeatable parts without using traditional saws, routers, or manual polishing for every project.
Signage and Advertising Displays
Acrylic sheets are widely used for business signs, logo panels, illuminated letters, wall signs, menu boards, and point-of-sale displays. Clear and colored acrylic can create a clean, professional look for retail stores, restaurants, offices, and exhibitions.
For signage work, extruded acrylic is often used when the main goal is a smooth cut edge. Cast acrylic is better when the sign also needs clear engraving or frosted text.
Retail Displays and Product Stands
CO2 laser cut acrylic is common in retail display stands, cosmetic holders, jewelry displays, brochure racks, phone stands, and product shelves. These parts often need clean edges, accurate slots, and repeatable dimensions.
Laser cutting is useful for small-batch production because designs can be changed quickly without making a mold. This makes it suitable for custom display projects and personalized store fixtures.
Lighting Panels and Decorative Parts
Acrylic works well for LED light panels, lamp covers, edge-lit signs, decorative wall panels, and custom home décor. Clear, frosted, and colored acrylic sheets can all be cut into complex shapes with a CO2 laser.
For lighting applications, material choice matters. Clear acrylic is often used for transparent covers, while frosted or engraved cast acrylic can help diffuse light and create a softer visual effect.
Prototypes, Covers, and Functional Parts
Laser cut acrylic sheets are also used for engineering prototypes, machine guards, electronic enclosures, control panels, jigs, templates, and protective covers. Acrylic is easy to inspect because it is transparent, which makes it useful for testing layouts and checking internal components.
For functional parts, check the required thickness, strength, temperature resistance, and edge quality before choosing the acrylic sheet. Thicker acrylic may need more laser power, slower speed, and careful focus control.
Personalized Gifts and Creative Products
Acrylic laser cutting is popular for personalized gifts, keychains, nameplates, awards, plaques, jewelry, ornaments, cake toppers, wall art, and craft products. These projects often combine cutting and engraving on the same sheet.
If the design includes detailed engraving, cast acrylic is usually the better material. If the design mainly needs smooth cut shapes, extruded acrylic may be more cost-effective.

How Much Does a CO2 Laser Cutter for Acrylic Cost?
The cost of a CO2 laser cutter for acrylic depends on laser power, working area, machine structure, cooling system, exhaust system, controller, and production requirements. A small desktop CO2 laser may be enough for hobby projects, while a larger production machine is better for signage, displays, and batch cutting.
If you are comparing budgets, Riselaser’s guide on laser cutting machine cost explains the main price factors that affect laser equipment selection.
Conclusion: Choosing the Right Acrylic Sheet and CO2 Laser Settings
Successful acrylic laser cutting comes down to three main factors: choosing the right acrylic sheet, using the right CO2 laser settings, and controlling focus, air assist, and ventilation. Cast acrylic is usually better for engraving, while extruded acrylic is often better for clean cutting edges.
For most acrylic sheet projects, a CO2 laser is the best choice because it can cut clear, colored, cast, and extruded acrylic more reliably than diode or fiber lasers. Start with safe settings, test on scrap material, and adjust speed, power, focus, and air assist until the edge quality is stable.
If you are cutting acrylic for signs, display stands, lighting panels, covers, decorative parts, or small-batch production, choosing the right CO2 laser cutter can save time and reduce waste.
Need help choosing a CO2 laser cutter for acrylic sheets? Contact Riselaser and tell us your acrylic thickness, sheet size, application, and expected production volume. Our team can recommend a suitable laser power, working area, and machine configuration for your cutting needs.
FAQs About Acrylic Sheets for Laser Cutting
What is the best acrylic sheet for laser cutting?
The best acrylic sheet for laser cutting depends on the result you need. Cast acrylic is best for engraving because it creates a sharp frosty white mark. Extruded acrylic is often better for clean cutting edges because it can produce a clearer, flame-polished edge with a CO2 laser.
Can a CO2 laser cut clear acrylic?
Yes. A CO2 laser can cut clear acrylic very well because acrylic absorbs the 10,600 nm CO2 laser wavelength. This allows the laser to vaporize the clear acrylic sheet instead of passing through it. For clear acrylic, a CO2 laser is much more reliable than a diode laser.
What laser power do I need to cut acrylic sheets?
A 40W–60W CO2 laser can usually cut acrylic sheets up to about 6 mm, depending on the machine condition, lens, focus, and settings. For thicker acrylic sheets, faster production, or more stable edge quality, an 80W to 100W+ CO2 laser is usually a better choice.
Should I remove the protective film before laser cutting acrylic?
In most cases, keep the protective film on during laser cutting. It helps protect the acrylic surface from smoke marks, scratches, and light residue. Remove the film after cutting. If the film material is unknown or unsafe for laser use, test a small piece first or remove it before cutting.
Can a fiber laser cut acrylic?
A fiber laser is not recommended for cutting acrylic. Fiber lasers are designed mainly for metals, while acrylic absorbs CO2 laser wavelength much better. For acrylic sheets, plexiglass, clear panels, signs, and displays, a CO2 laser is the better option.